Documentation Contents wordpress plugin resources analysis
| Download This Plugin | |
| Download Elegant Themes | |
| Name | Documentation Contents |
| Version | 1.0.0 |
| Author | Sarah Bird |
| Rating | 0 |
| Last updated | 2012-08-22 04:37:00 |
| Downloads |
1260
|
| Download Plugins Speed Test plugin for Wordpress | |
Home page
Delta: 0%
Post page
Delta: 0%
Home page PageSpeed score has been degraded by 0%, while Post page PageSpeed score has been degraded by 0%
Documentation Contents plugin added 2 bytes of resources to the Home page and 21 bytes of resources to the sample Post page.
Documentation Contents plugin added 0 new host(s) to the Home page and 0 new host(s) to the sample Post page.
Great! Documentation Contents plugin ads no tables to your Wordpress blog database.Create a table of contents for your documentation. Mark your posts with multiple tags so you don't have to duplicate posts to create a new version of your documentation when you have a version upgrade. Put your posts in categories to order your documentation into chapters. Optionally use a custom field for fine-grained control over the order of your posts.
Shortcode
In a page or post where you would like to display a table of contents enter the following shortcode.
[documentation-contents tag="v1.16" parentcat="server"]The above shortcode is used to display the page here. The tag specifies the tag that you have used to mark the version of your software. The parentcat is optional. If you don't specify it, the software will first look for a default parent category set in your Options and will finally just default to all.
Mark versions of your software using Tags
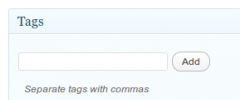
Use the Wordpress tag feature to tag your post with the different version of software that it applies too. You can tag the same post with multiple versions so that you don't have to duplicate content.
Organize your documentation into chapters using Catagories
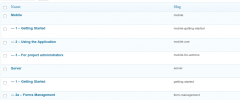
By marking your post as being in a category, that is the chapter that it will end up in. Your Table of Contents will use Category names as chapter headings. Wordpress allows you to create categories with sub-categories. You can use this feature to host documentation for different things in the same place. See screenshots for an example. You then mark the parent (top-level) category in the shortcode e.g.
[documentation-contents tag="v1.16" parentcat="server"][documentation-contents tag="v1.16" parentcat="mobile"]You can set a default parent category in Options. If you do this, you could skip the parentcat option in the shortcode.
Use a custom field for fine-grained control over the order in which lessons appear.
In the absence of a custom field, the posts will just be displayed in alphabetical order.
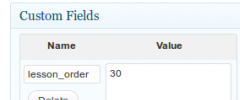
However, I don't find that its a good idea to use numbers in my post title to specify order. Because a lesson can be used over and over again for multiple versions then you're not always guaranteed that the first number you give it is going to be the right one. So, in the options (see below) you can specify a custom field. Once you start with custom fields, you can't go back. All posts that you want to show up in your documentation must have this custom field. I use "lesson_order" as my custom field and as I'm starting out I use 10, 20, 30, 40 etc. That means that if I add an extra lesson later, I can make it 31 or 32 and I won't have to change anything else and it'll work just fine.
Options
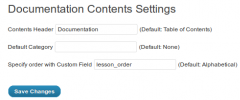
Under the administration dashboard, Settings, you'll find a page Documentation Contents. See screenshots.
Contents Header is used as a custom prefix, so if you don't want it to say "Table of Contents for xxx" it can say "Documentation for xxx" or anything else you want.
Default Category is used to specify a default parent category, to save you typing out parentcat="xxx" in each shortcode that you use.
Specify order with Custom Field. If this is not set, then posts will be listed in alphabetical order. If you do set it, then you will need to mark all your posts with this custom field in order for them to be displayed. Troubleshooting


